Introduction:
Getting into some fun stuff today and the next few days by introducing impulses (kinetic energy) and physics to the impacts our weapons cause.

Projectile Impulses:
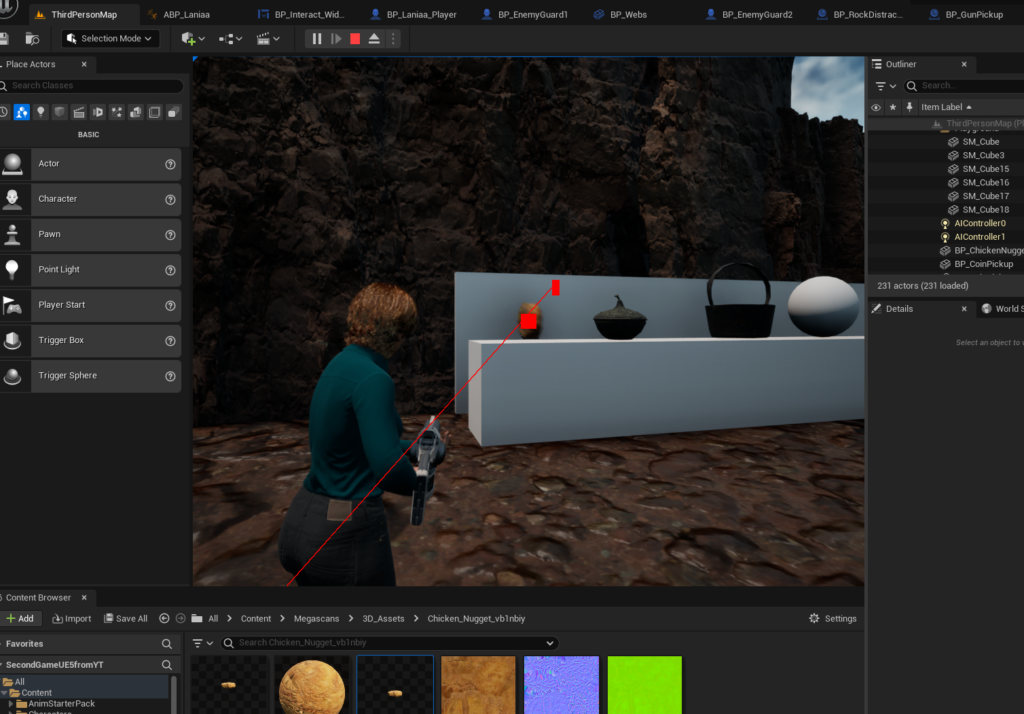
Previously I added the linecasting (line tracing) to the weapon fire, and today I’ve added impulses. This is like adding impact to a kinetic weapon, so when the projectile hits something that projectile carries energy with it and transfers that energy into the object it hit (assuming physics is turned on for that object). This allows you to push spheres around by shooting them, for example or knocking giant chicken nuggets off a table.
Physics:
Shooting an object in Unreal Engine is fine, but physics is usually turned off by default which means there’s no physical effect, no energy transferred and nothing visual to indicate you hit anything (other than the linecasting used for debugging). I set up several objects on a platform and turned on physics for each object. I also enabled collision for each object. What this means is now the bullet/projectile do transfer their energy into those specific items I have set up.

Camera Adjustment:
Initially I had the projectile start at the end of the weapon, but I found it impossible to hit anything since the player control is tied to the camera and not where the weapon is pointed. Rather than trying to join the player control, camera view, and weapon direction all together, instead I simply made the projectile start at the middle of the camera (player’s view). Now you will hit what you are looking at as long as it’s in the center of your screen.
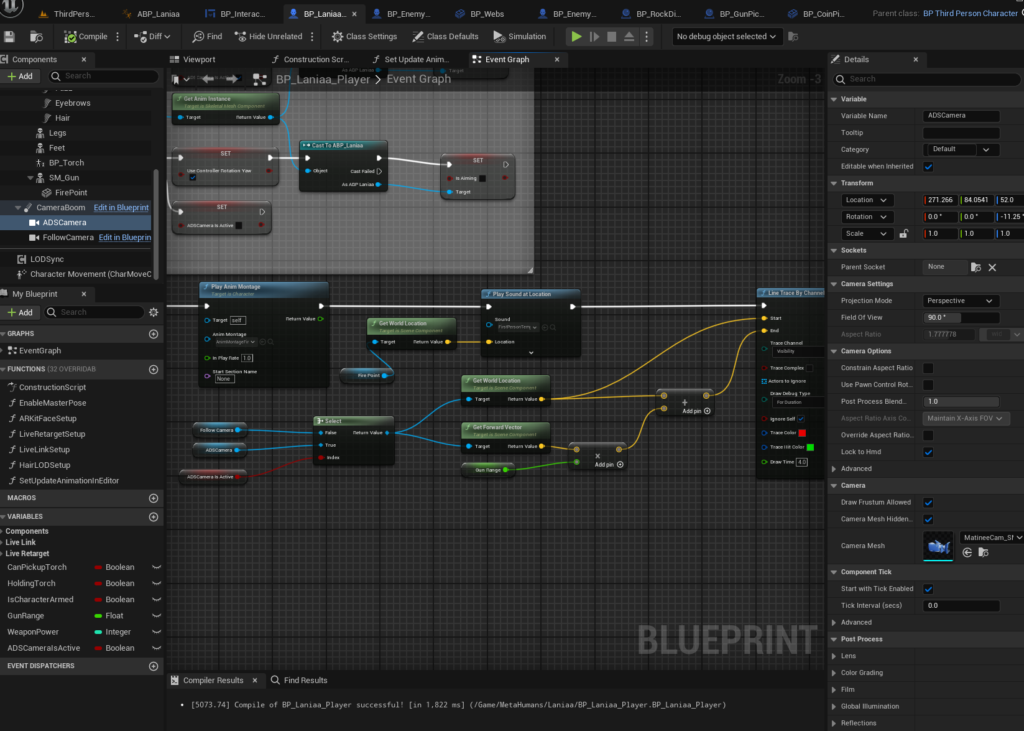
I also want to discuss how I made the camera switch happen. Previously the location the projectile started and the direction it traveled was based on the world location and forward vector (direction it’s pointing) of the end of the weapon. As stated above, this wasn’t a good experience for the player and decided to tie it to the camera view. The problem is there are two camera views. There’s the ‘FollowCamera’ and the ‘ADSCamera’ and I needed to determine which camera was in use and then use the world location and forward vector of whatever camera was active.
I found a useful blueprint node called a “Select” node that allows me to use both the cameras as separate inputs. I also set up a boolean variable that tracks whether the ADSCamera is active. When active, the boolean is true and when inactive the boolean is false. The Select node uses the variable as a condition, if true then use the ADSCamera and if false use the FollowCamera, which is then connected to the world location and forward vector nodes.
Technically you can’t fire the weapon unless ADSCamera is active which is based on a conditional statement placed in the blueprints related to when the player clicks their mouse to fire. However, I wanted the flexibility of adding ‘hip fire’, which basically means firing the weapon without using ADS view and the select node was a requirement for eventually turning on that functionality.
Conclusion:
The next few tutorial videos I follow will be fun. I really enjoy physics and I’ll also be introducing health points an destruction to objects that will react to being struck by projectiles or potentially even other objects.